Tuesday, August 24, 2010

My Babys First Day of Kindergarten!


Awww my baby isn't much of a baby anymore *tears*


My sweet baby girls! Notice Ariel's T-Shirt, it says "I <3 MJ" She is a HUGE Michael Jackson fan! lol

When we first got out on the playground, Amerie was a little nervous because she didn't see anyone she knew. Then before you know it, she spotted two of her friends and ran off to play.

Aaron, Ariel and I walked Amerie into her class room and waited till she was situated at her table. This is when Mommy's eyes filled with tears. It's really happening, my baby is growing up. I held back from balling my eyes out but I thought it was sweet to see just how many moms there where wearing there hearts on their sleeves and just balling as they left their babies for their first day of kindergarten.

I love you my Amer, we are so incredibly proud of you!

REVIEW: NEW Maybelline The Falsies Volume Express WATERPROOF Mascara


$7 @ Target


Loving this mascara right now! It gives me these perfectly separated lashes that are nice and dark and full! mmmmm Thanks Maybelline!


Don't for get to watch my review!

Tuesday, June 15, 2010

3TanjaJ3's Vacation Theme Contest Entry #2 Mountain Getaway


My "Mini Masterpiece!" So very proud of this one!

For most of my nail art, such as this one and the Beach Inspired entry,I draw my ideas out first on a piece of paper so I have an idea of how to place things on the nail itself. I had a vision for this nail and it ended up coming out better than my idea!!!

I'm beginning to think, in the nail art world I may have a real talent in doing landscapes! Not to toot my own horn but, TOOT TOOT!lol j/k Seriously though, I really shocked myself with my landscape style designs!

I have memories of my Dad painting in our basement of the home I grew up in, like he was Bob Ross. He would paint these beautiful landscapes, mainly of mountains and open fields and stuff. I guess I might be following in Daddy-O's artistic side except my canvas is these small nails!

Please let me know what you think! I love the feedback!!
Thanks so much for taking the time to visit my blog!!

Please, watch the video of how I created this "Mini Masterpiece!"

3TanjaJ3's Vacation Theme Contest Entry #1 Beach Inspired


To create this nail, the only products I used was water and acrylic paint! You know, the acrylic paint you would buy for your kids craft time? YES! That kind of acrylic paint!!

This was BY FAR my favorite nail that I personally have created! I am so very proud of this one and how perfect (in my opinion) it came out!!

Watch the video on how I created it:

Nina Ultra Pro Nail Polish Review


Purple-Xing


I must admit I only have a few Nina Ultra Pro nail polishes, so I guess you could consider me a newbie. But let me offer you my thoughts and feelings on this specific color from the Nina Ultra Pro nail polish line.

Packaging: Short and fat bottle! I love it! Sometimes when you see those nail polish bottles that are tall and thin, they are easily tipped over. This bottle is well proportioned and sits fine on the counter without fear of me tipping the bottle! This may sound like a an odd way to start reviewing this product eh? =D

Brush: Short brush wand = better control. As for the brush itself, the bristles are full enough to distribute the perfect amount of polish allowing even coverage.

Nail Lacquer:

-Only takes two coats to get full coverage!

-Dries almost immediately! And if you want to add more than two coats, any bubbling will not show since there is glitter in it. (You know when you don’t let the polish dry in-between coats? It bubbles due to the air trapped under the lacquer.)

-The glitter found in the polish reflects in rainbow color, depending on how the light hits it, the glitter will appear purple, blue, green, red and silver without taking away from the purple base color. The glitter, when dry, will also feel rough on the nails resulting in, for example, it would be easy to snag your panty hose. Therefore, I applied a top coat that somewhat ‘sealed’ the glitter.

Lasting power: *Disclaimer-I am terribly rough with my nails so polish tends to chip rather quick even with the best top coat, so take this as my experience only.

-Two days after application my polish began to chip at the tips, only slightly. I did apply China Glaze Top Coat, however I really didn’t focus it at the tips so that may add to the problem.

-From my experience with glitter polishes they tend to last FOREVER and can be difficult to remove, same goes for this one. Which is why I had applied it in the first place…With my busy schedule approaching I needed a polish that would need very little maintenance, this one did the job and lasted well over two weeks!

My Husband Aaron YouTube: http://www.youtube.com/user/verbateem
Textual Errors thanks to Mr. Funny Man Himself
This is what happens when I leave Aaron around the computer, alone!

"I must admit I only have a few Nina Ultra Pro nail polishes, so I gas you could consider me a newbie."

"Brush: Short brush wand = better control. Ass for the bush itself, the britches are full enough to distribute the perfect amount of polish allowing even coverage."

Friday, May 28, 2010

Sony Handycam DCR-SX44--Review


Complete Details:

Cost (Without tax):
* $269-$399 Depending on GB size (Model type also differs)
* $800-$1000 (Approx.) Available in HD model types

Service and Warranty Information:
* Limited Warranty Term : Limited Warranty --- 1 Year Parts; 90 Days Labor
*Limited warranty, you can also purchase additional warranty protection.(I have an additional 2 year service warranty that
cost $20 extra-worth it if you have kids like mine! lol)


Display:
* LCD Screen : 2.7” Clear Photo™ LCD3 (230 K) display
* Display rotates 270 degrees (perfect for YouTube purposes, so you can see yourself while filming!)


Video:
* Format : SD (MPEG2)
* Video Signal : NTSC color, EIA standards


Weight and Measurements:
* Weight (Approx.) : w/o battery: 6oz (190g), w battery: 8oz (230g)
* Dimensions (Approx.) : 2 x 2 1/4 x 4 1/2 inch (50 x 55 x 112mm)


Hardware:
* Manual / Auto Lens Cover : Manual
* Zoom button on LCD : Yes
* Media Card slot : Memory Stick PRO Duo™ MARK2 Media and SD/SDHC/SDXC (Class 4) media (Sold Separately)


Power:
* Battery Type : InfoLITHIUM® with AccuPower™ Meter System (NP-FV30)
* Power Requirements : 7.2V (battery pack); 8.4V (AC Adaptor)<---Both Included
* Power Consumption (in Operation) : 1.8W
* Battery Life (AVERAGE): Model type-
NP-FV30 = 110MIN
NP-FV50 = 215MIN
NP-FV70 = 440MIN
NP-FV100 = 870MIN


Audio:
* Recording Format : Dolby® Digital 2ch stereo
* Microphone : Built-in Zoom Microphone

Optics/Lens:

* Lens Type : Carl Zeiss® Vario-Tessar®
* 35mm Equivalent : 39 - 2340mm (16:9), 44 - 2640mm (4:3)
* Aperture : F1.8-6.0
* Digital Zoom : 2000x
* Focal Distance : 1.8 - 108mm
* Focus : Full range Auto / Manual (Touch Panel)
* Shutter Speed : Auto, 1/4 - 1/4000
* Minimum Illumination : 3 lux (Auto Slow Shutter ON, 1/30 Shutter Speed)
* Optical Zoom : 60x
* Resolution : 680K


Convenience:

* Face Detection : Yes (Exposure Only)
* Image Stabilization : SteadyShot® image stabilization
* Quick On : Yes
* Removable Flash Media Compatibility : Memory Stick PRO Duo™ MARK2 Media and SD/SDHC/SDXC (Class 4) media (Sold Separately)
* Face Index : Yes
* Film Roll Index : Yes
* Still Image Mode(s) : JPEG
* Hybrid : Yes
* Fader Effect(s) : Black, White
* Exposure : Yes (Touch Panel)
* Scene Mode(s) : Auto, Twilight, Candle, Sunrise & Sunset, Fireworks, Landscape, Portrait, Spotlight, Sports, Beach, Snow
* Photo Capture from Movie : Yes
* Slide Show Mode : Yes
* Direct Copy : Yes
* Multiple Language Display : Yes


Product Options:
* Red
* Silver
* Blue

*4GB
*16GB
*80GB

Software:
* Supplied Software : PMB Ver.5.0 Supports Windows XP Service Pack3 (SP3)(32bit), Windows Vista Service Pack2 (SP2) (32bit), Windows 7,
64-bit editions and Starter (Edition) are not supported. Not supported by Mac OS.
* Operating System Compatibility : "Windows XP SP3 * /Windows Vista SP2 ** /Windows7 * 64-bit editions and Starter (Edition) are not supported.
The Windows Image Mastering API(IMAPI)Ver.2.0 or later is required to use the function for creating discs. ** Starter (Edition) are not supported.
Standard installation is required. Operation is not assured if the above OS has been upgraded or in a multi-boot environment. "

***THE SOFTWARE IS INCLUDED, BUT I DON'T THINK IT IS NECESSARY. I UPLOAD PICTURES AND VIDEO JUST FINE WITHOUT USE OF THE INCLUDED SOFTWARE. SO IF IT
IS NOT COMPATIBLE WITH YOUR OPERATING SYSTEM DON'T SHY AWAY FROM THIS PRODUCT***

Cons:
*Lens Cover is manual-must open and shut it yourself instead of it opening automatically when camcorder turns on.


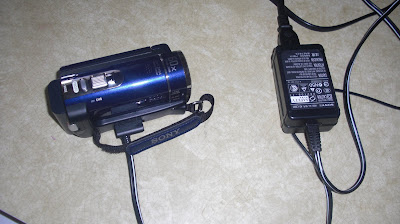
*Camcorder must have battery attached to camera in order to charge. (Which for me is really no big deal but I can see how it could be an issue for others)


*Takes a larger SD memory card than digital camera SD cards. (Which isn't that big of a deal but if you don't already have a SD Duo Pro memory card,
they cost around $15-$80 depending on GB amount)


*Photo quality is grainy(CON), which really shouldn't be an issue as this is not a "camera" it is a camcorder, the quality is in the video(PRO)!!

I give this camera 5 STARS on a five star scale! I absolutely love it!

Thursday, April 29, 2010

Nail Art: TiMe To RoCk


Nail Art: TiMe To RoCk

Really didn’t care for this one!


I had a vision which really didn’t come out the way I had hoped.

The part where it was just the paint splats, I really liked that. I just might do this one over here’s what I’ll do different next time… I will do the same up to the paint splats and then to make it edgier I think I would apply a skull and cross bones directly in the center of the nail barely overlapping the splats.

Yeah that sounds good. I tried adding too much to too small of a space, this is one where less is better.

Either way it was fun and I hope it inspired you to make something that much better! Best of luck and thanks for watching and taking the time to read the blog!

Love you lovelies!
C

Wednesday, April 7, 2010

Swamp Monster


November 2009 Nails Magazine Page 54 Design originally done by Lynn Bui Today Nails, Mocksville, N.C.


Redone by me Carly!


Nail Polishes used:
Sinful Colors-Innocent
L.A Colors Art Deco-Black
Stripe Rite-Green (sorry the # rubbed off)
Stripe Rite- Gold #698555
Clear top coat by Carlo Di Roma (Found this at the dollar store!)

Song information:
Until We Bleed
Performed by: Meghan Tonjes
Meghans YouTube: http://www.youtube.com/user/tonjesml
Purchase her albums here: http://www.meghantonjes.com

I have permission to use this song. Thanks Meghan!

Monday, April 5, 2010

Lipstick Tips


TIP #1: A great trick to have that very clean looking lip line and to prevent any color from bleeding or feathering, apply a concealer around the lips after you’ve applied lip liner and lip stick.

Tip #2: If your lipstick looks like a little much try blotting. Blot your lips on a clean tissue. Once you do this if it just looks too dull now, apply a thin layer of gloss to bring back some shine!

Tip #3: To prevent lipstick from getting on your teeth try this trick! My mother taught me this when I was young and it works like a charm! Put your clean finger in your mouth, let your lips hug your finger and pull your finger out. You will get all the excess lipstick on your finger and not on your pearly whites!

Tip #4: To get a plumper lip apply lip gloss to the center of your lower and upper lips. The light will shine off the lip gloss giving an illusion of plumper lips!

Tip #5: Lip liner not only for the lip line but the whole lip! Applying your lip liner down on to the lips will act as a base for your lipstick and will also help prevent your lip color from bleeding or giving you that ugly feathered look.


Tip #6:
Heavy eye makeup means go light or nude on the lips. Light eye makeup means you can have a bold lip! Too much on the eyes matched with too much on the lips can look circus clownish or like something right off the runway, which we all know can look odd at times!

Tip #7: Experiment with color, not all colors look good on everyone. Find lipstick that suits your skin color, for example pale skin can pull off, most times, bright reds, however if you have red hair this may or may not work for you. Dark skin and bright red lipstick may be too harsh. It’s all about experimenting with color and seeing what works best for you. Often times a nude lip fits everyone! Just don’t have a too dark lip liner if you want to go nude!

Tip #8: Once you get down to the base of your lip stick and think you are out, try cleaning out the tube. Usually you have another half a stick of lip stick in there! Then use the next tip…

Tip #9: Smash your lipsticks for a better color pay off and a creamier application. Apply with a disposable lip brush you can find in bulk at most beauty supply stores. Store your smashed lipstick in small containers such as a pill box or small bead container. Get creative, go to a craft store and see what small storage containers you can find!


Tip #10:
And for Lip gloss, if you think the tube is empty think again! Place your so called “empty lip gloss” tubes in a microwavable safe cup full of water. Place it in the microwave for about 20 seconds to warm up any lip gloss in the tube, which will then settle at the bottom of the lip gloss container. Often times your lip gloss tube will be half full of product again! Gee it’s like magic!

Image credit: http://www.freewomenblogs.com

Saturday, February 20, 2010

Bubble Nails?


What do you think about "bubble nails?" At first I honestly thought of infected nails covered by paint, but after looking at it for a while I am thinking this is kinda cool looking! Most definitely a unique idea recently introduced in the nail art world!

In order to create these "bubble nails" all you need to is basically pile acrylic into a large hump on the nail. You can then design the bubble by applying nail art any where from simple nail polish or by encapsulating items inside clear acrylic, buffing and curing.